Monday, June 23, 2014

Pretty Side Tables get a Annie Sloan Chalk Paint Makeover!


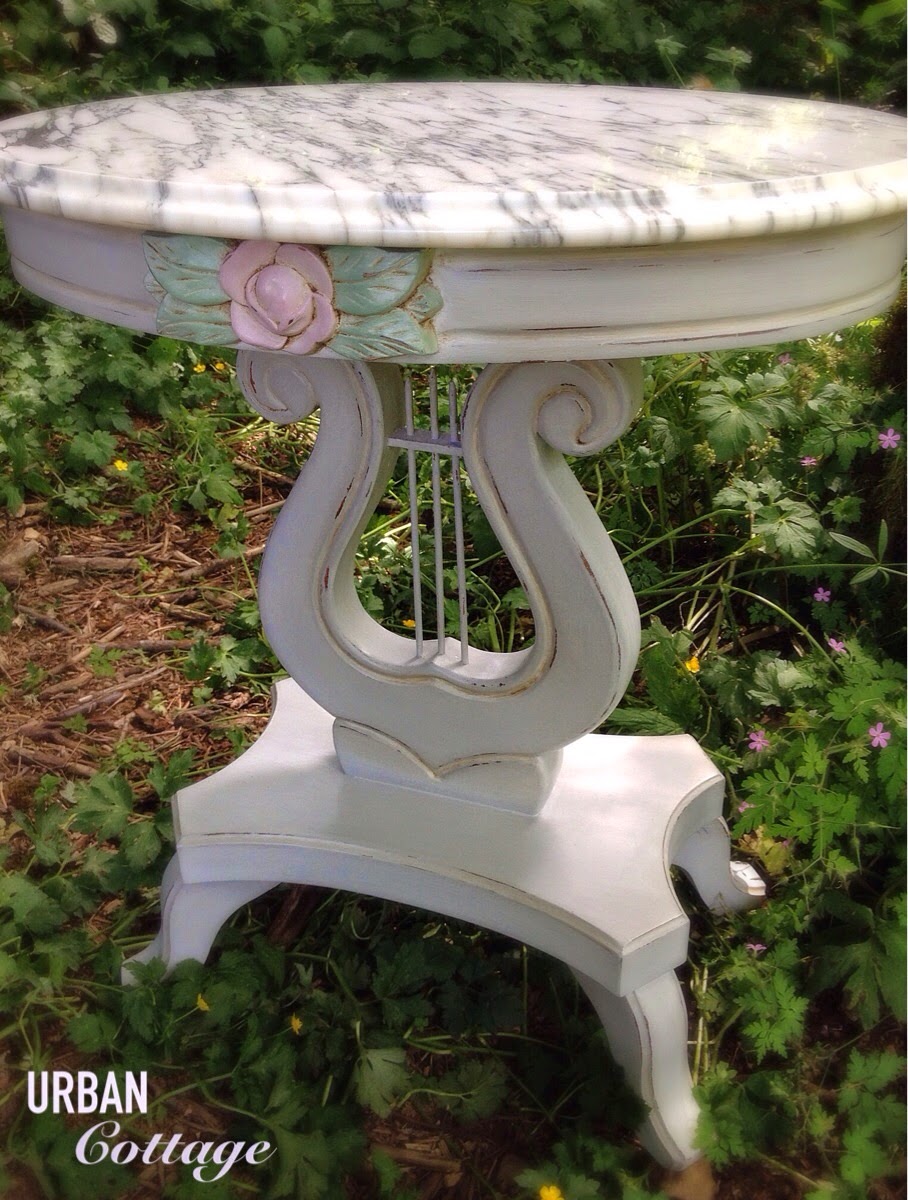
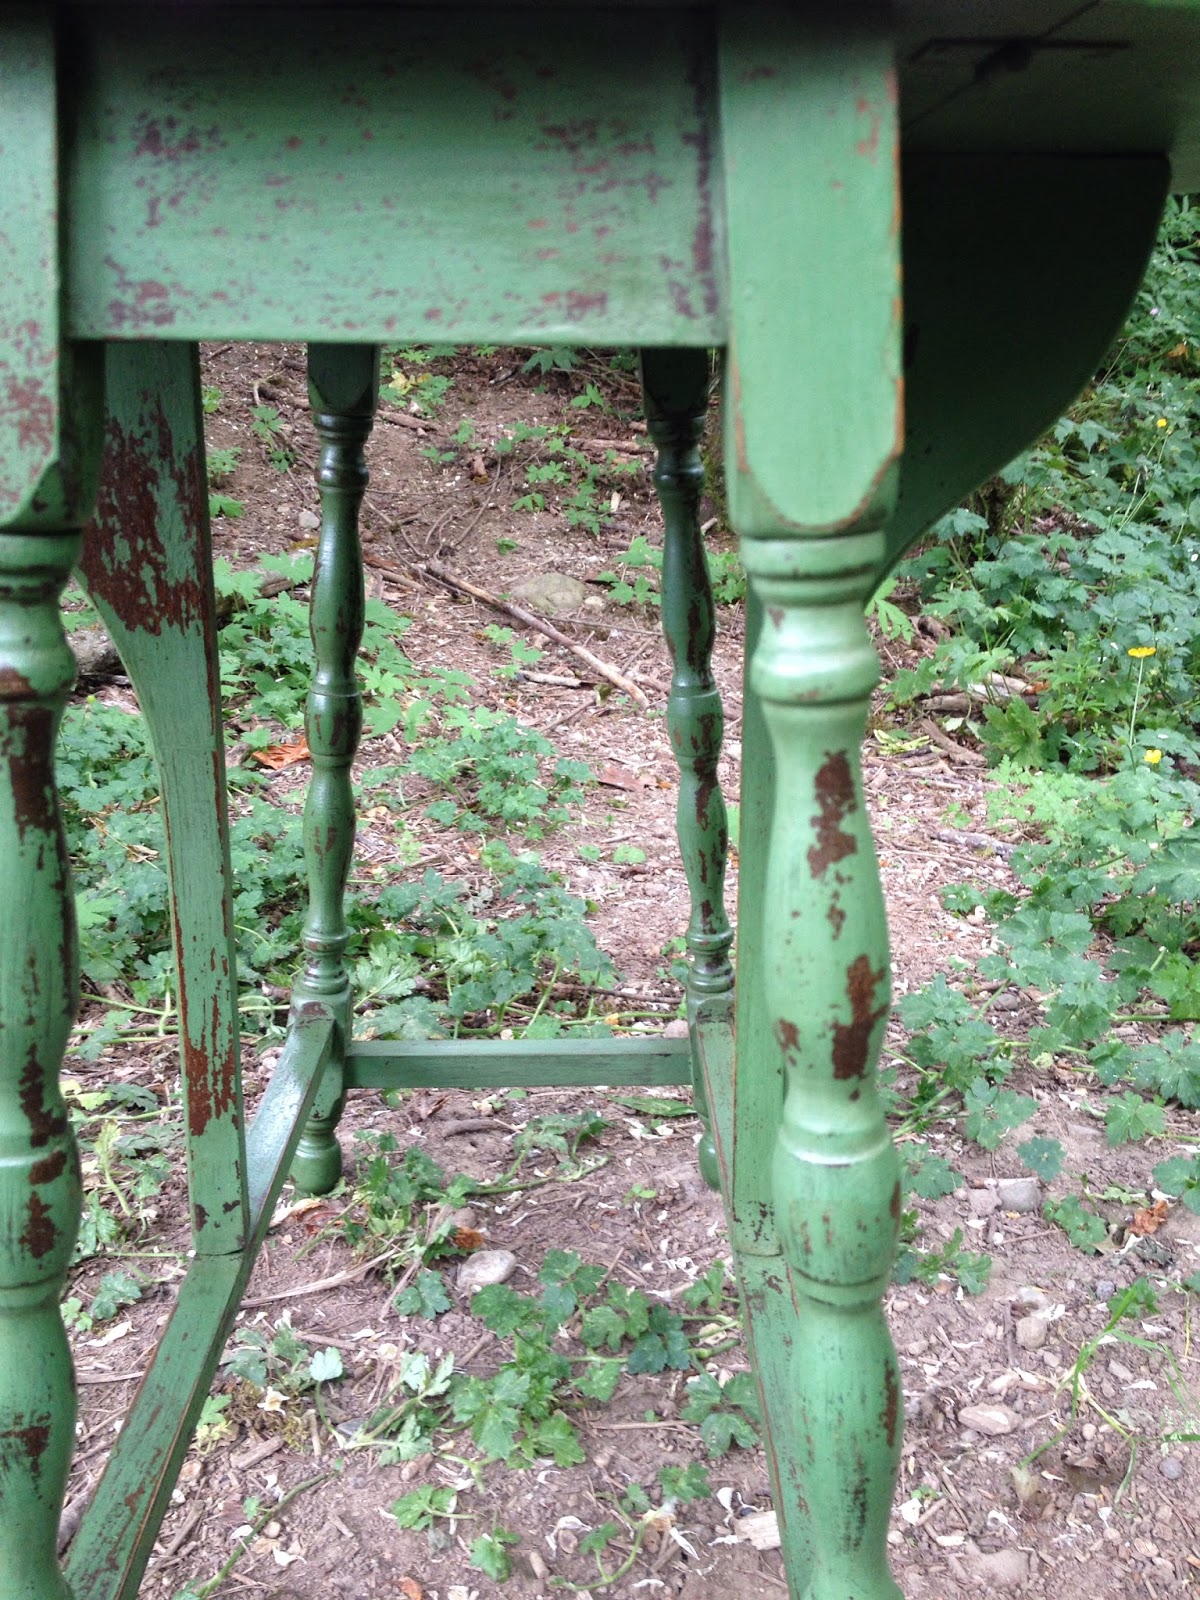
I call these my splurge tables! I've never paid so much for side tables before, but I fell in love with the harp base and rose detail. My husband would never want anything this feminine in our home, so it was especially fun to be able to work on a style of furniture I love but wouldn't ever have in my home. 
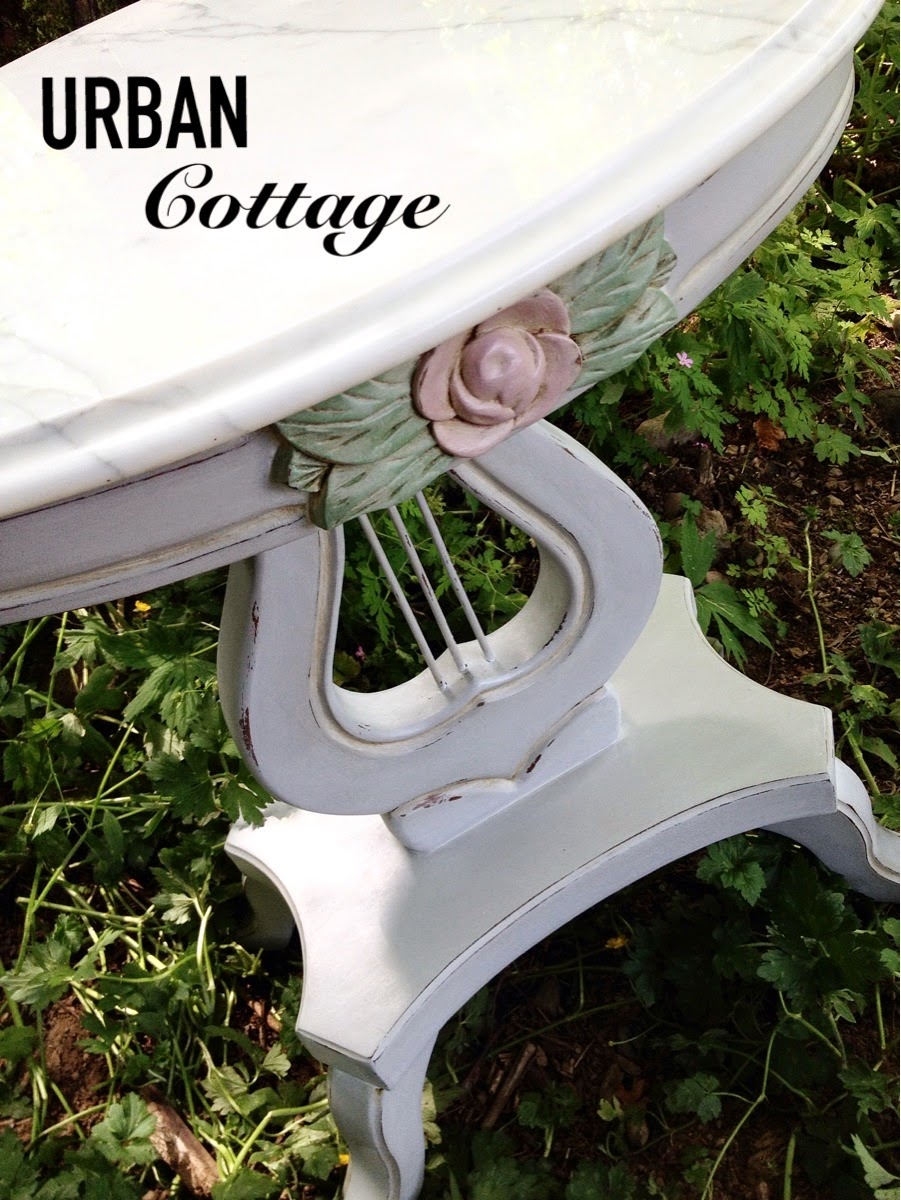
These tables were meant to be painted with Annie Sloan Chalk Paint. I went with Paris Grey and was really impressed with the coverage! I've been working on some MCM dressers in white and even though I primed and primed and primed, I still had a hard time getting them white, so I was nervous this color wouldn't cover that well. (Save that for another post) thankfully two coats gave me solid coverage. I wanted more texture, so I mixed up some pure white with Paris Grey and water and did a quick wash over the entire piece. I just brushed on then wiped off with a rag. 


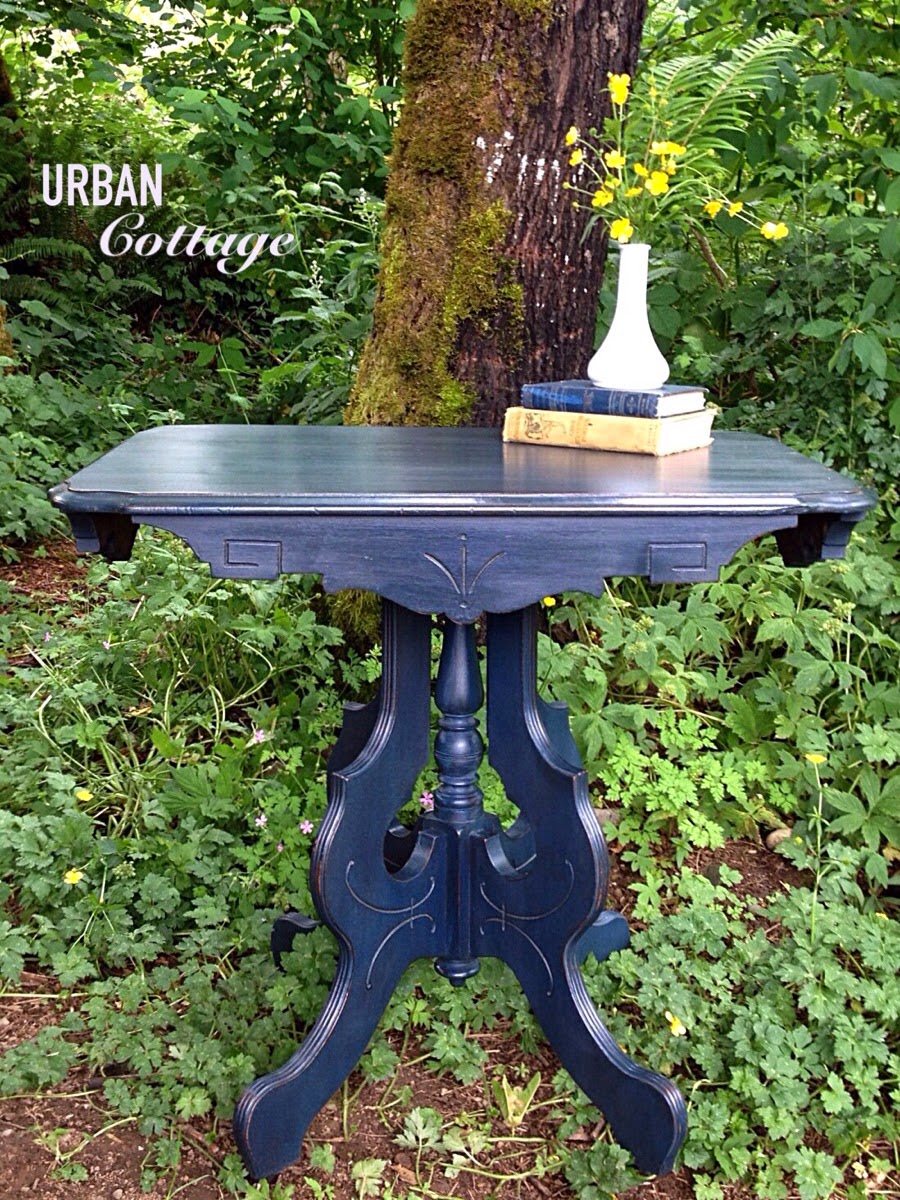
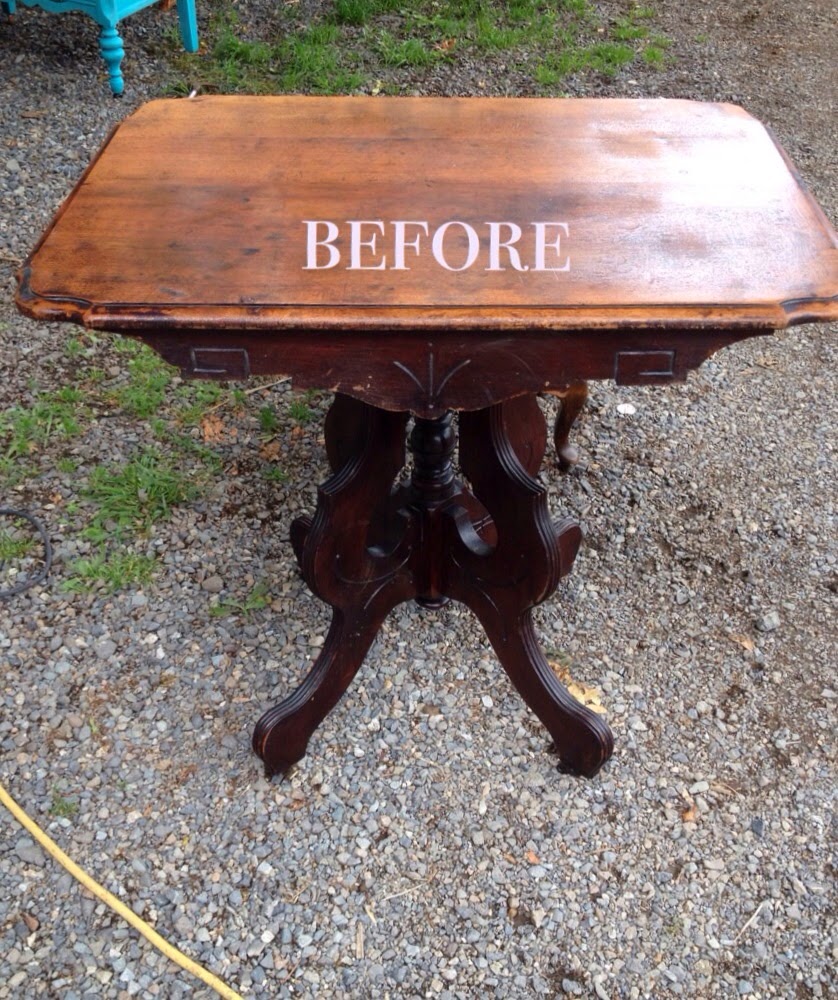
They were lovely before, but I think having them painted is a beautiful update. 


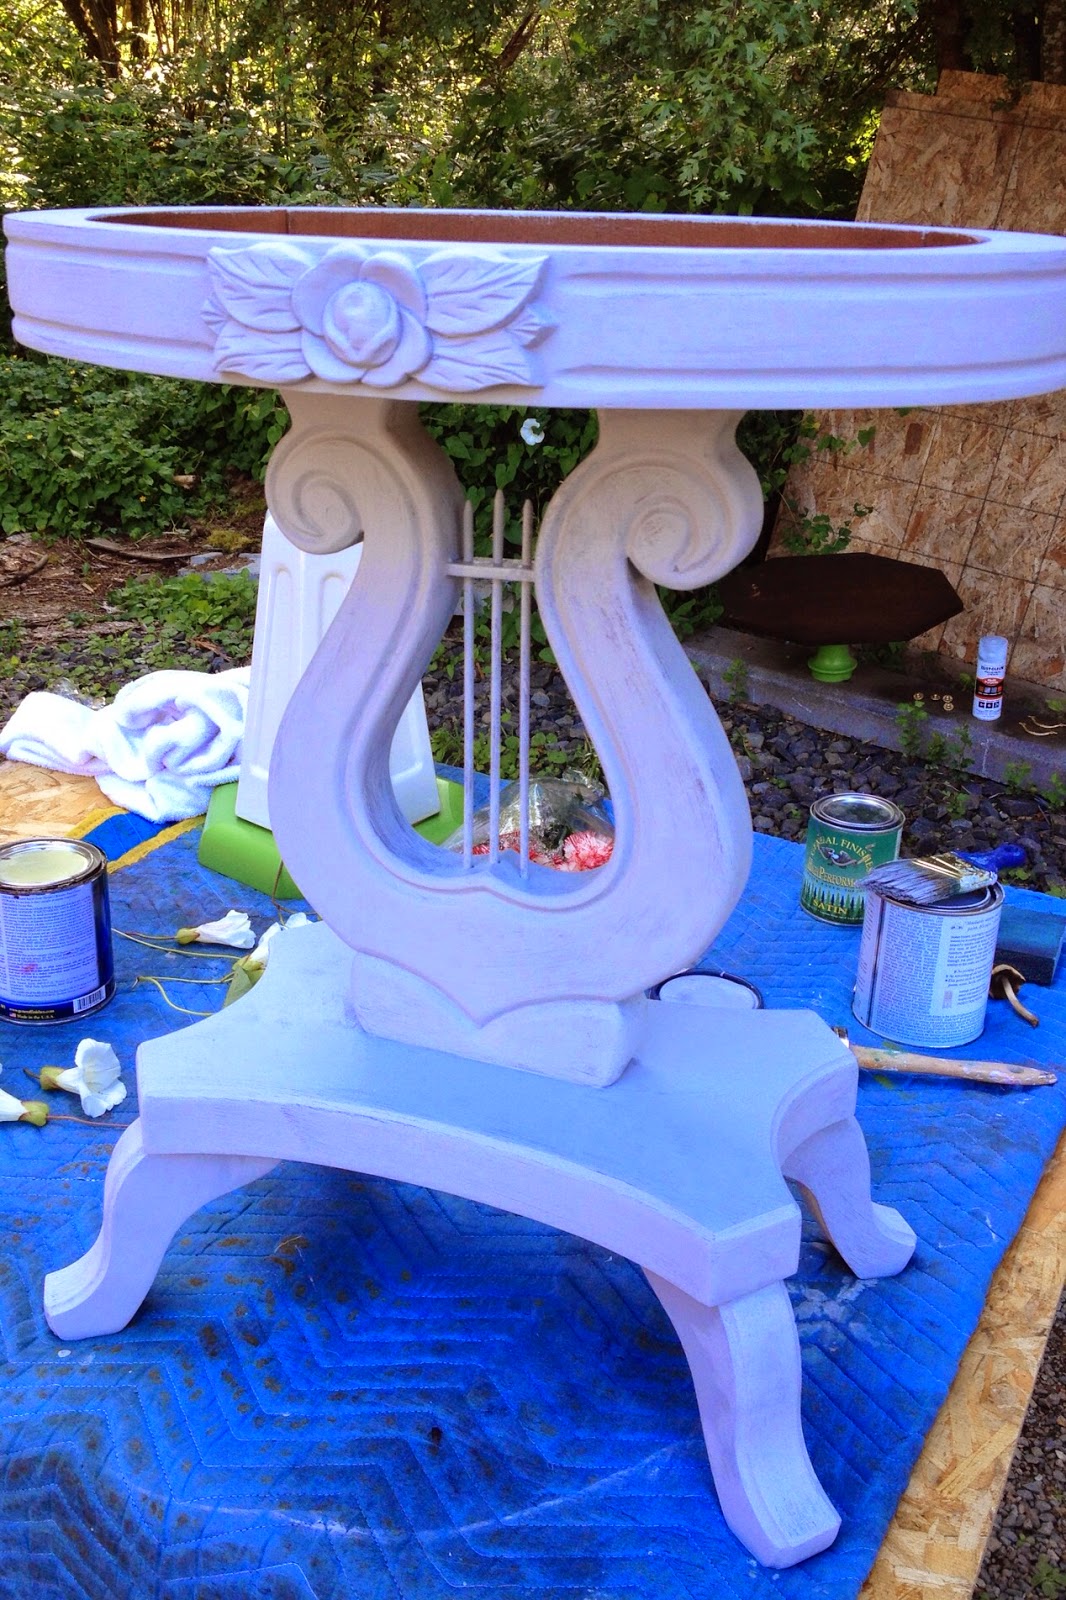
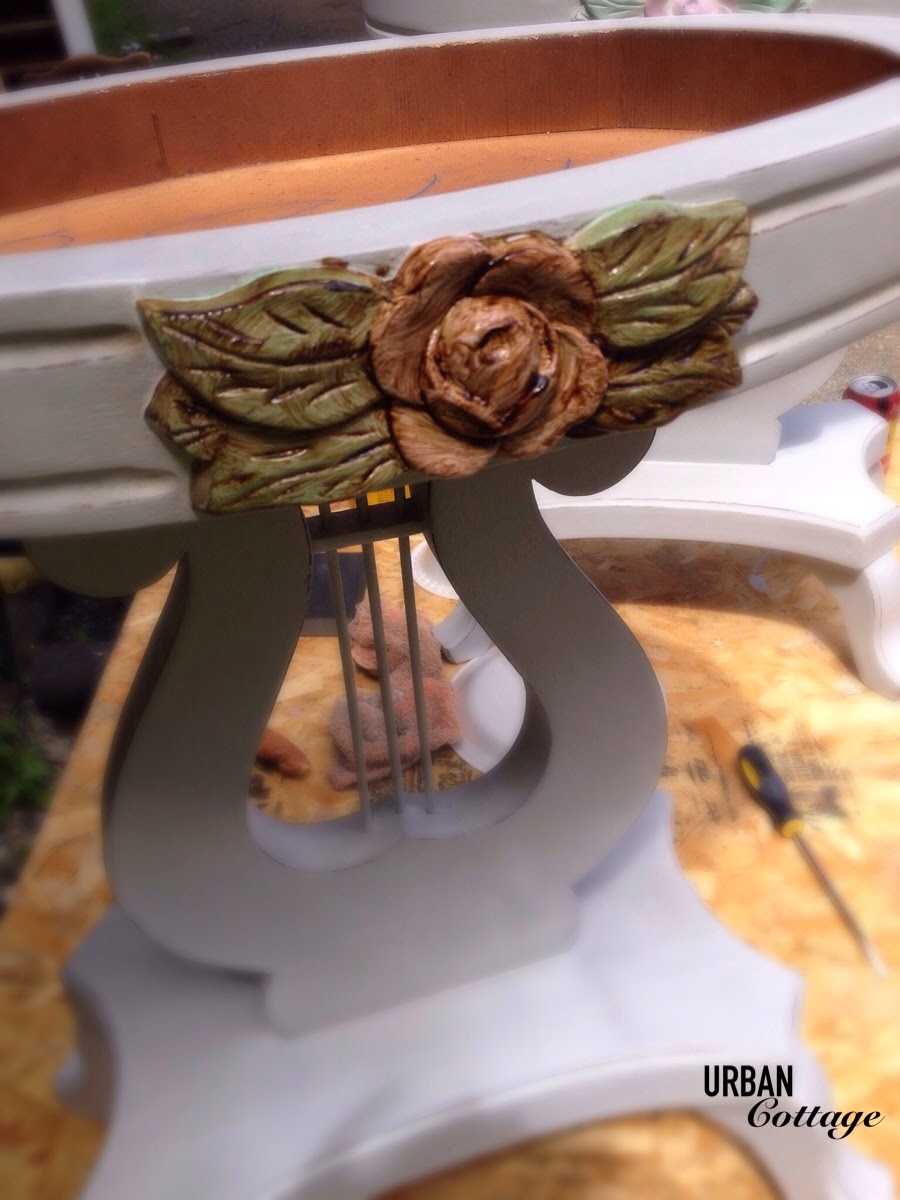
Here's after just one coat of paint!

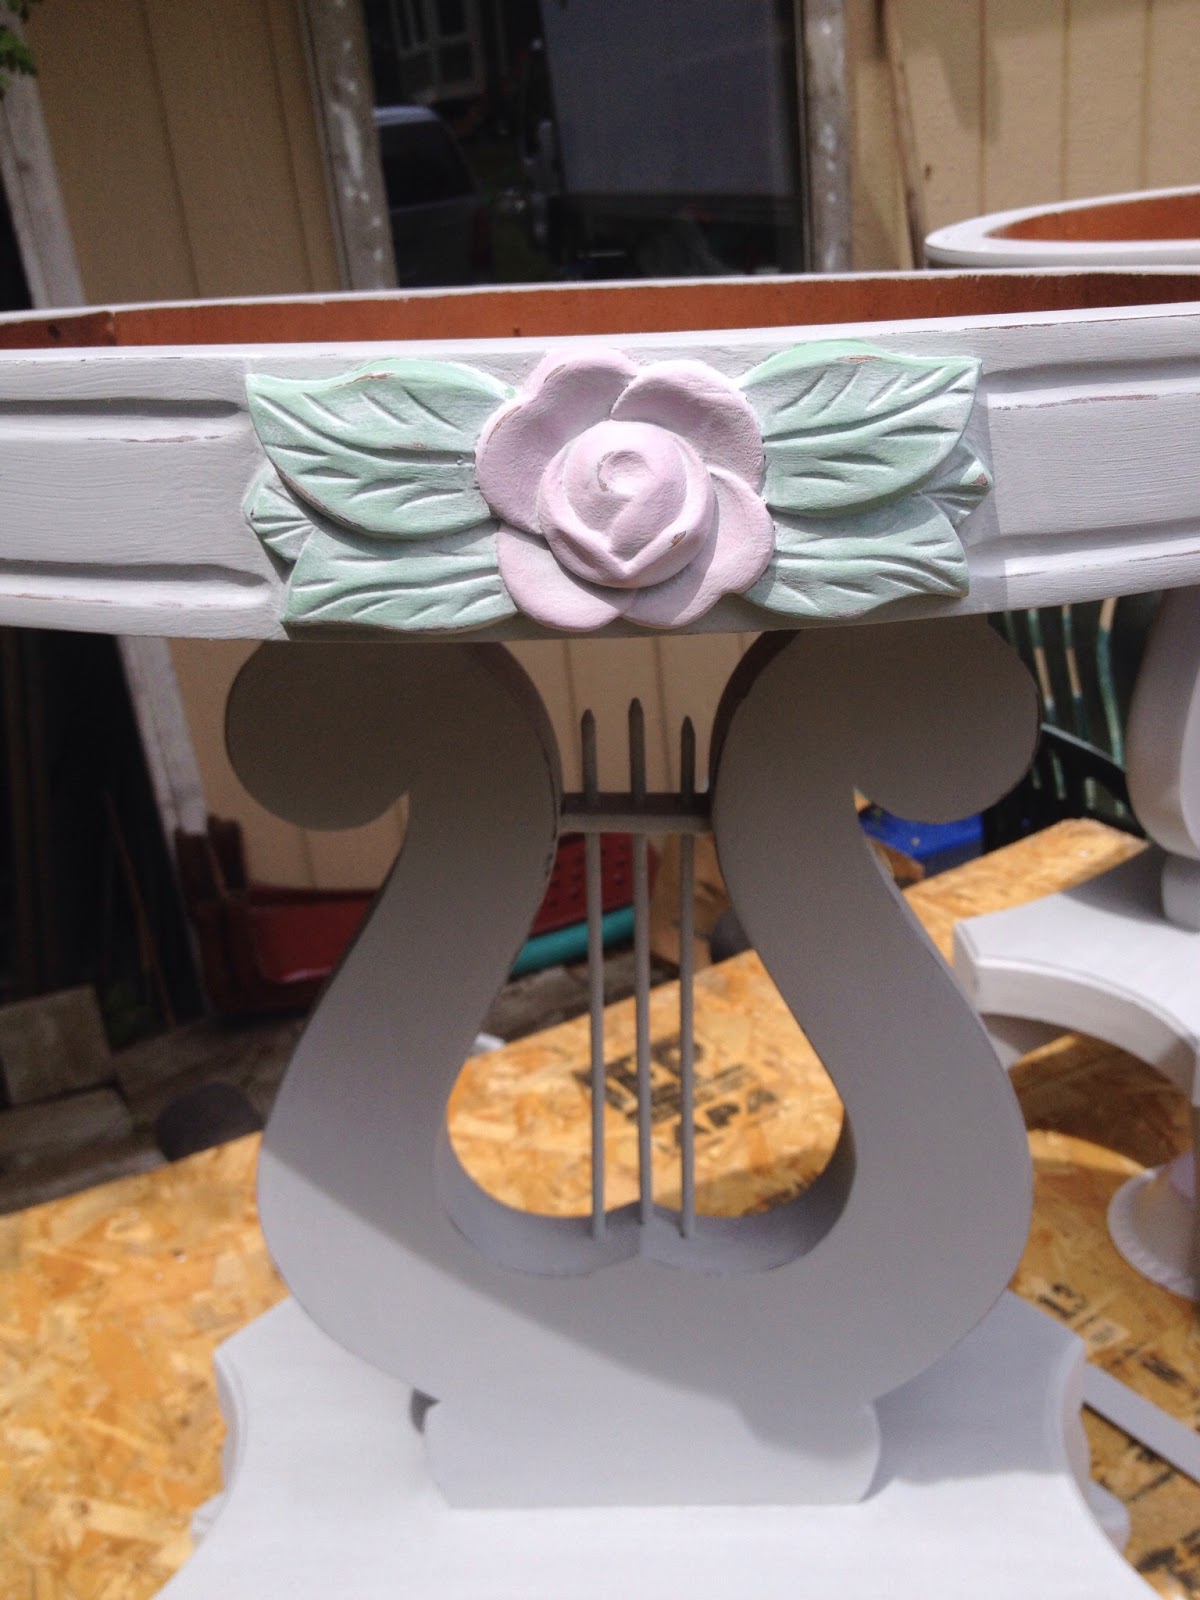
I mixed Antibes Green with Duck Egg Blue till I got a green shade I liked. I used a small brush to paint the leaves, it only took one coat. Then I mixed Henrietta with pure white for the rose. Again, one coat and it was good to go. I used my "wash" mixture over the flowers and leaves. 


Next step was to distress the entire piece. I used a wet rag to distress along with a sanding block. After wiping it down, I used Minwax in clear to seal the entire piece. I'm always a little nervous using dark wax, so I made sure the parts that I would use the dark wax on were really well coated in clear 
wax first. I kept my rag for clear wax on hand in case I needed to pull off the dark wax in a hurry. I used Maison Blanche dark wax because that's what I had on hand. 


Looks a little scary at this point, but thankfully it wiped off nice and just settled into the cracks giving it a beautiful aged look. I used a brush to apply it to the details, waited a minute and then gently wiped it off. 


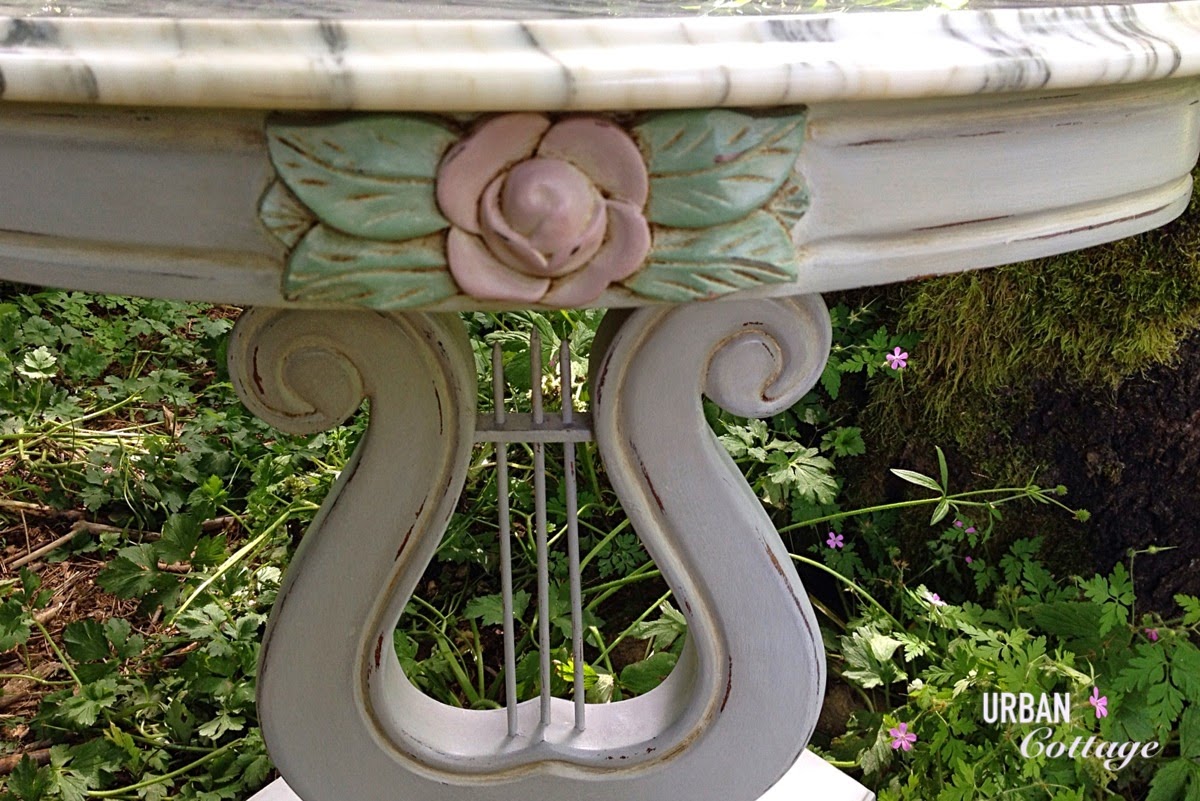
I did the same in all the recessed detail to add that aged look. Buffed it all out with an old rag to get a nice sheen, put the gorgeous marble tops back on and now they await a new home! Would love to see where these beauties end up. 

Thanks for visiting!
 ~Aurora 


Thursday, June 19, 2014

Eastlake Table gets a Milk Paint Makeover


Hello! I'm gonna keep this post really short as I forgot to take photos during the painting process. Oops. 
There's not a crazy amount to share anyways, so I know you'll let me off the hook ;)

Here's a "before" picture. It had quite the varnished finish so I used my orbital sander where I could and a sanding block on the rest. I was planning on using Milk Paint and even though I sanded, I had a feeling I should use some bonding agent mixed in with my milk paint. I may not have needed it, but I didn't want it crazy distressed so I added it for good measure. 
I used The Real Milk Paint Co. in the color Union Blue. It's a really beautiful, rich, masculine color. I did two solid coats. I had minimal "chipping" but it did distress nicely. 
I used Minwax Special Dark Wax to seal the table and again it buffed out to a nice shine...I love this stuff! 
Thanks for stopping by,
Aurora


Friday, June 13, 2014

A Green Milk Paint Table


This petite drop leaf table was begging for a rustic makeover. I headed out to the hardware store in our area that carries The Real Milk Paint Co. to decide what new colors should be purchased. This color is Green. Not really a shade I'm drawn to, but thought it would fit this little table perfectly, plus it's fun to try new colors. 
I lightly sanded this piece and then cleaned it before painting. 


If you're a diyer and after that super chippy look, you really should try a true Milk Paint that comes in powder form. It's so easy to use and in a lot of cases practically does the hard work for you. I painted 2 coats after mixing equal parts powder to water. I didn't add any bonding agent because I wanted it to be chippy. 


As you can see from the above picture, the paint starts to pull away as it's drying. In my experience, it's random and really unpredictable, which is one of the things I love about a true Milk Paint. Once my second coat was dry, I took a fine grit sanding block to the entire table. Like I said, it really does the work for you at this point. The paint decides where it will chip off and be distressed. Easy peasy! The paint stuck a bit more to the top where I sanded better to get rid of some of the nicks. So I did have to sand a bit more and decide where I wanted distressing. 
I used Minwax in Special Dark to enrich the color and seal the Milk Paint. It went on beautifully and buffed to a nice shine. This was my first time using Minwax in Special Dark. I was really happy with the way it went on and buffed out. I will definitely be using it on future projects. 
This little table has a new lease on life and is ready for a new home. It's now available at The Design Cottage in Tacoma Wa. 

Thanks for stopping by! Hope you found something useful 
Aurora 


Wednesday, June 4, 2014

Mid Century Modern Hutch~ no paint necessary.


This is actually a "furniture painting" blog. However, it just so happens that some really great pieces, that in my personal and humble opinion should not be painted, have come my way. I have such a love for mid century modern pieces! I have painted MCM  pieces for a variety of reasons, however, this is teak and in really good condition, therefore no paint needed!


Like I said, great condition considering it's age and was obviously a well loved piece, since they had it custom made for themselves. This thing is SO well constructed, solid and heavy! So much so that apparently they decided not to move it when painting their walls because I had to get off white paint splatter marks on both sides. It was imbedded in the grain so I found that a razor blade was the best thing to scrape out the paint with. After I cleaned it up and got all the paint removed I got out my trusty Restore-A-Finish.  Do you use this product???


It's AMAZING!! Seriously, it's the best! Comes in tons of colors, I used Mahogany on this Hutch. It's the easiest stuff to use and makes those scratches and dings look so much better if not completely erasing them. 


Look at the top after using Restore-a-Finish! If you want to freshen up any of your wood pieces you have at home, just get the right color finish, wipe on with a rag and be in awe of its restorative powers!


I wish I had nice staged photos of this piece, because it really deserves it, but like I said this thing is HEAVY and we ran out of time before bringing it into The Design Cottage in Tacoma Wa. where it can now be purchased. 
Thanks for stopping by! 
~Aurora 


Tuesday, June 3, 2014

American of Martinsville Side Table gets a General Finishes Makeover


I picked up this cool mid century modern side table at a Goodwill the other day. I was immediately drawn to the legs on this piece. The top was pretty roached out, but I was hopeful it could be sanded down and refinished. 

I already started sanding the nastiest part when I remembered to take a photo. You can still see it was gross. I started with 180 grit sandpaper using the orbital sander then went up to get a nice smooth finish. I used sanding blocks to sand that lower ledge that I also wanted stained. 


Here's a before after I had finished sanding. Great legs right!? 


I used one coat of General Finishes Java Gel Stain on the top and ledge. I use an old washcloth and wipe it on in the direction of the wood. I don't use much, I'm basically wiping it on and then wiping it back off.  I did this in the evening and by the next morning it was ready to go. I could have done another coat to get a more uniform finish, but I really like the variation in the wood so I left it. 


I think it looks really pretty and the inlay is a nice touch too. Next I taped off the bottom edge. It's a good idea to run some clear poly along your tape line to prevent bleed thru. A trick my momma taught me :) 


I used General Finishes Milk Paint in the color Klein Blue. I LOVE this color and think it looks especially good on MCM furniture. It took three coats to get solid coverage. I used a high quality sash brush. I used Johnson's Wax to give this piece added protection, one coat over the painted surfaces and several coats over the stained wood. 


The inside of the drawer was a little icky so I used this black/grey/gold  handmade paper I had left over from another project  to line the drawer. After cutting it to fit I used a spray adhesive to glue it in place. 


I wanted more substantial knobs for this table than the originals. I happened to have these hammered gold knobs on hand from Hobby Lobby and thought they would be perfect against Klein Blue. 


This was a really fun and easy project thanks to my General Finishes Products! I highly recommend their products. I haven't used all of them, but what I have used, I've been really impressed with. FYI, I in no way get compensated for my good review of General Finishes products. I paid retail price for my materials. I just really like this product and wanted to share. Of course, if they did want to send me product I wouldn't decline ;) 

Thanks for stopping by, hope you found something useful!
~Aurora 


Wednesday, May 28, 2014

A Vintage Hutch ~ with just a little Paint


This gorgeous Vintage Hutch with great curvy legs had me swooning the moment I spotted it on Craigslist! It had only been posted for 3 hours, it was a fair price and close to my home. I acted quickly. Fortunately for me I did, because when I got there the lady said there was a half a dozen people waiting behind me to get it...SCORE! I'm not gonna lie, there's a little thrill in getting to something first when you know other people want it! RIGHT!? I know I'm not alone, even if you won't admit it ;)


I had all kinds of grand ideas about painting this hutch {oh, it would have been fabulous} but upon seeing it and realizing what great condition it's in, I decided I would deny myself the pleasure of painting it and let the natural beauty of the wood shine! Although I'm a furniture painter, I appreciate wood and the original artist. In general I try to paint only pieces that really need it in order to be cherished again. I know this piece will be a great addition to someone's home in its {mostly} unpainted state. When I was inspecting the interior, I saw that someone had tried re-staining the inside, with not much success. My intention was to sand down, and re-stain, hopefully with more success. There were some stain marks that were so deep into the wood, I called my husband out to look and he agreed I probably wasn't going to get those out....now what??? It was either live with the marks or paint over it. Clearly from my picture, I decided to paint. Maybe I could have kept sanding, and made it look pretty good with stain, but my gut told me it wasn't gonna happen (or maybe it was my sore neck) so I listened and went with a nice neutral. Besides, I really thought it would make the fret work pop, and it does!

I didn't get a picture, but the entire top edge had some nastiness that wasn't going away either. 


I used General Finishes Seagull Grey Milk Paint (not an actual Milk Paint) for the interior. I've only recently started using this product, but it's quickly becoming a favorite! It dries fast, goes on beautifully, and has awesome coverage! I did 2 full coats and a quick touch-up in a few spots, but that's all it needed to be completely covered. I used a small roller, i think the kit at Depot is under $3 to make quick work of getting the paint on, then I like to lightly brush over it. I did one coat of their High Performance Top Coat in Satin using a cheap foam brush.

I think it's more noticeable in person, but this gives an idea of what the Danish Oil did.

After cleaning the whole piece, I used Danish Oil to touch up the few spots that were marked up. I just put some on a rag and go over the places that look a little scratched. That's not what the directions say to do. You're suppose to sand off all the old finish and then use the Danish Oil. My mom had told me years ago to use good 'ol Danish Oil to freshen up scratches and it works great! Of course, you should always use all products according to the directions.  I don't...but you definitely should!(that's my disclaimer)  I'm just sharing what worked for me on this piece.

I forgot to throw in the topcoat in this picture, but besides that, here are the products I used. 


I'm really pleased with the way the Hutch turned out! Some may cringe that I painted even the interior, but I really like it. I think it's a great balance of old/original with just a bit of new.  Now it's off to The Design Cottage in Tacoma Washington to await a new home where it can be enjoyed for many more years!


Thanks so much for stopping by and reading my little blog! Hope it was useful :)
~Aurora